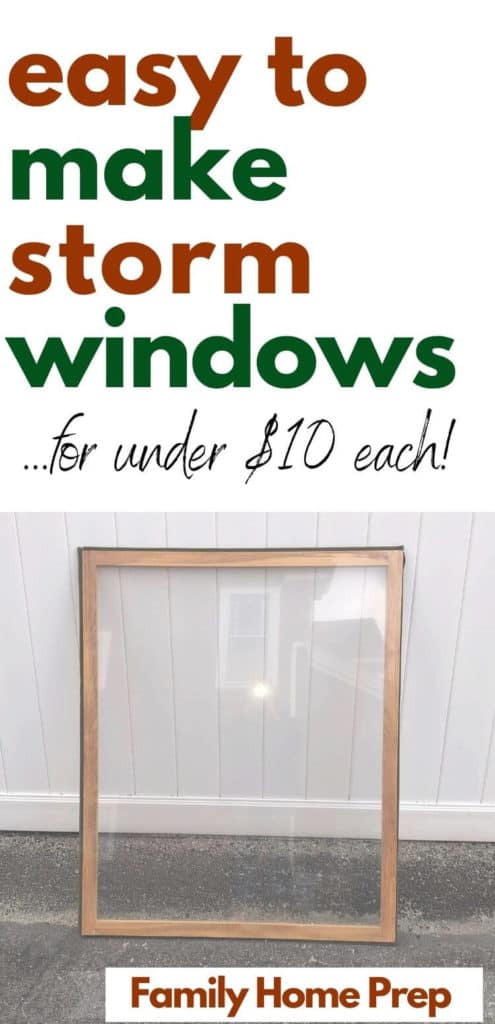
Why Make Storm Window Inserts?
If you live in a cold climate, you know the importance of having well-insulated windows. Windows can account for up to 85% of the heat lost in your house.
These interior storm window inserts are extremely cost-effective, insulate well, and are very easy to make.
Once you have followed the plans to make one storm window insert, you will know how to make interior storm window inserts for all the windows in your home.
Best of all, only basic woodworking tools are required.
But first, a few basic details about interior storm window inserts to help you decide if they will work for you:
- Building these storm window inserts will save you money, effort, and time. Custom-made windows will cost hundreds of dollars more and may need to be installed. x
- If you are not using storm windows, this interior storm window kit idea can significantly reduce your heating bill.
- Using plastic shrink wrap is what makes this project an affordable, weekend project. Just search for interior storm window inserts at Home Depot.
- To improve the efficiency of these storm windows, they are double-paned.
- The windows are very lightweight and easy to install and remove.
- You can construct this window (as will be discussed) to fit in with your home decor by adding
If you feel this type of window will serve your purpose, we will now outline the steps on how to make low-cost storm windows. It is important to keep in mind that if you want interior storm windows that open, this project may not be suited for you.
Granted taking the lightweight storm windows out is not difficult if there is a need to open the window.
How To Make Interior Storm Window Inserts
If you already use plastic sheeting to insulate your home, you probably already know how effective this form of insulation can be. If you have always wanted to know how to make window inserts we hope you will find the answers in this article.
Best of all, because these double-paned windows are easy to insert and remove they will not cause damage to or discolor paint damage done to your window sills caused by the use of double-sided tape.
This project will show how to make low-cost storm windows that do not require any adhesives to keep the window in place.
Basic woodworking tools and supplies required:
Everything required can be found at a hardware store, Home Depot, or Lowe’s.
Tools:
- Miter Box and Saw: It does not have to be a powered miter saw since the largest wood you will be cutting is only 1” x 2”. whether you decide to do straight cuts or angle cuts a miter saw is the best way to make exact cuts. Straight cuts are the best for this project.

- Wood Clamp: Since the window is double-sided, you will need a shrinkwrap kit that is twice the dimensions of the window measurements calculated based on the information below.

- Hair Dryer To shrink the plastic any hairdryer will do. It is best if it has a variable speed control. Whatever heat source you use will work as long as you determine the intensity of heat or distance to hold the dryer so you do not burn a hole in the plastic. Overheating the plastic can also cause it to pull away from the edges. The amount of heat should be just enough to tighten the plastic and remove the wrinkles.

Supplies:
- Window Insulator Kit Since the window is Going to be double-sided, you will need a shrinkwrap kit that is twice the dimensions of the window measurements calculated based on the information below.

- 1” x 2 “ wood or resin The length of the pieces you will need will depend on the size of the window. (Allow extra length.)
- Wood glue Strong wood glue is recommended. For the best result, using both glue and screws is the best.


1. Measuring your windows for DIY window insulation inserts
Window measurements can be tricky because there is a need to make a lot of space allowances so they will fit properly.
The last thing you will want to do is measure incorrectly or not subtract room for weatherstripping.
Once you have completed a window insert, if you have to resize the interior storm window inserts, it will cost time and money.
Even worse is the frustration of having to start over. This is one of those times when you measure and then measure again. “Measure twice and cut once is what they say!”
Ultimately, you want the inserts to fit snugly.
The weatherstripping comes in ¼” or ½” thickness and this will have to be taken into account when measuring the actual size of the frame from one outside edge to the other.
This means it is necessary to subtract a ½” or 1” depending on whether you use ¼” or ½” weather stripping.
Example:
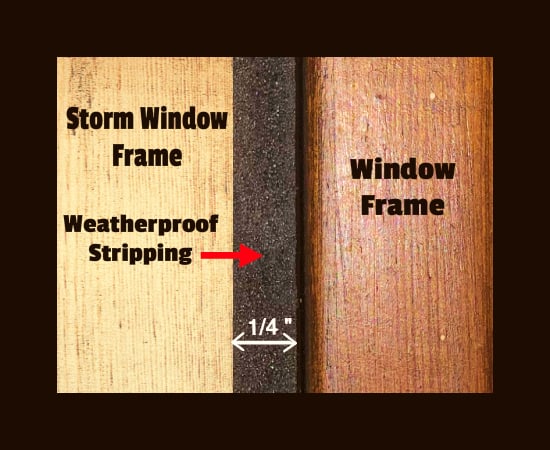
With 1/4″ weatherstripping, subtract 1/2″ from the height and width of the window dimensions.
2. Making the Frame.
What to avoid:
Constructing the frame is not hard though there are a few details you will want to keep in mind:
- Make sure to account for the thickness of the wood at each end when measuring the middle piece (see below).
- Since you will be allowing up to ½” (¼” on each side) for the weather stripping, subtract ½” from the height and width of the window measurement.
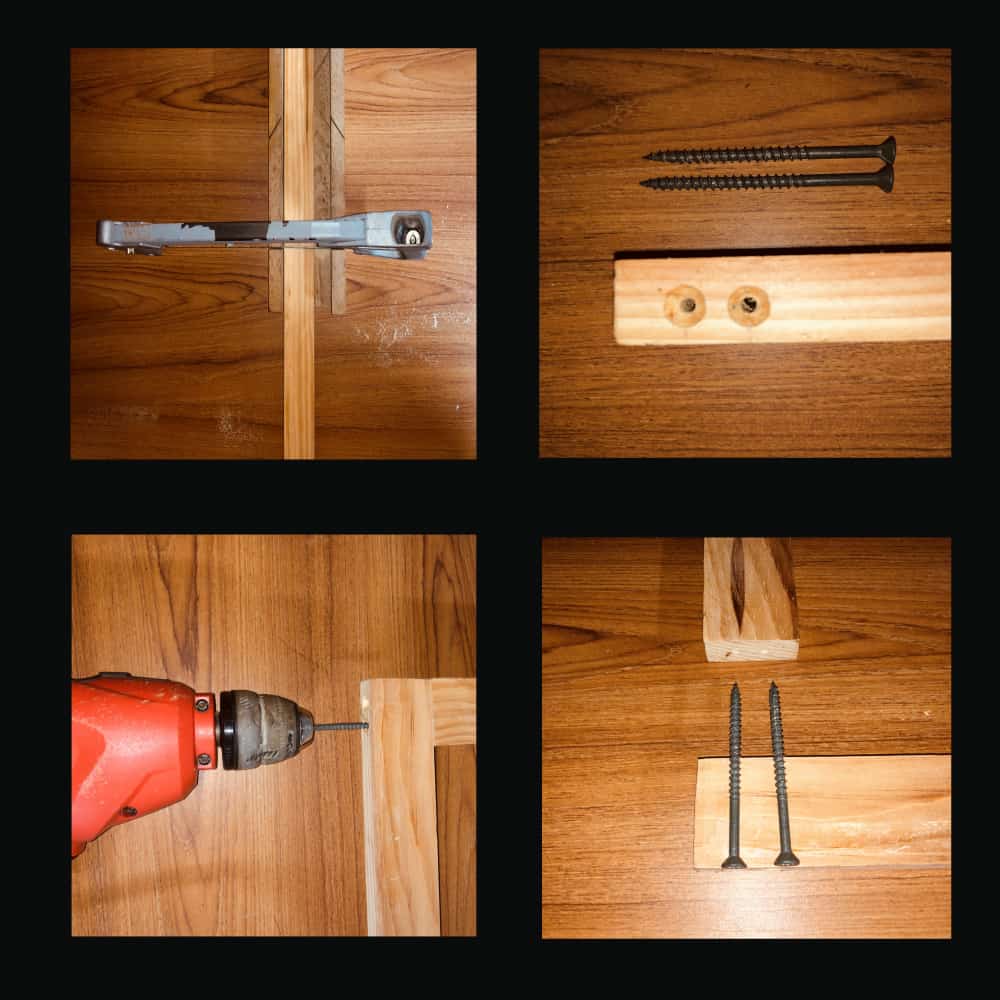
A) Cut the (4) 1”x 2” pieces of wood to the proper length to create the frame.
B) Connect each corner of the frame using screws and glue.
C) Be patient after you have completed the frame.
This project is not difficult and it is tempting to get it done quickly. Ideally, you should let the glue dry for 24 hours.
If the window is long, you will have to put a wood support piece in the middle of the frame.
If you want to create small-paned windows, this is also the time to put additional dividers in place.
3. Attaching the plastic sheeting:
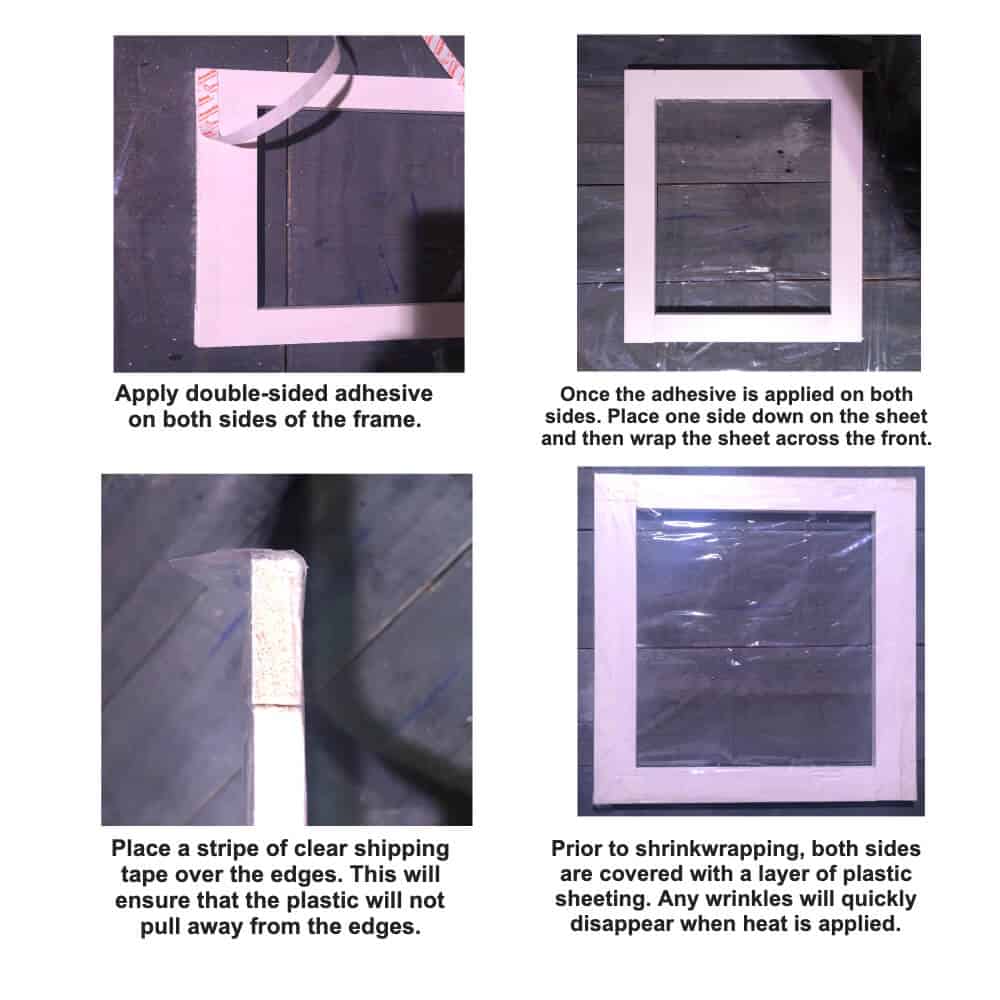
A) Place the frame on a clean, flat surface.
Cut a piece of plastic that will wrap around to cover both sides of the window.
You can do each side separately, but this will be more work and will not hold up as well.
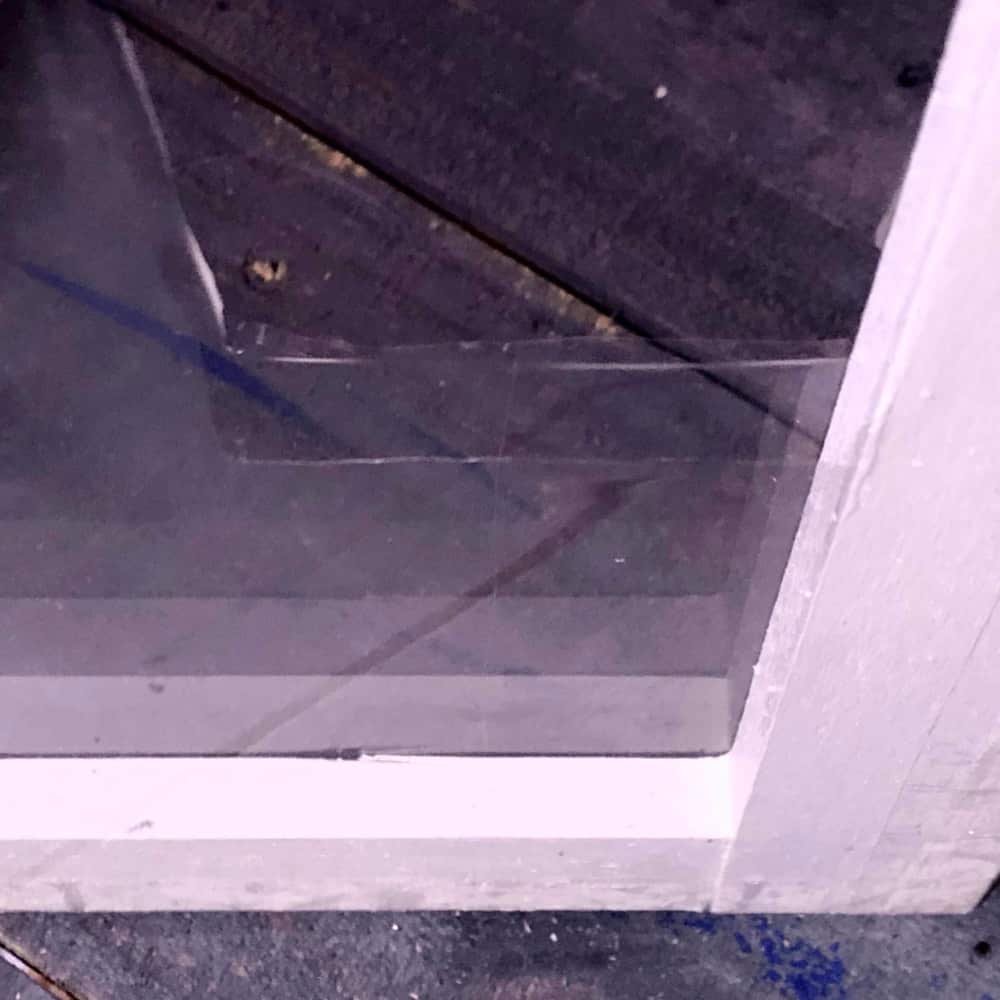
B) Place double-sided tape around the perimeter of the window on both sides and all around the edge. (see diagram)
C) Starting on one edge, adhere to the plastic sheeting and wrap the shrinkwrap around the entire window adhering to the end to the edge where you started.
Use a piece of double-sided tape to secure the end where you started.
The wrapping process does not have to be very tight as the plastic will tighten when the heat is applied.
It is better to focus on placing the sheeting correctly and not worrying about how tight it is.
D) Once you have wrapped the sheeting completely around the frame, use the UPS clear packaging tape to secure the ends.
It is best to also apply the packaging tape on the sides, as this will make a much stronger bond of the plastic to the frame and prevent it from pulling away during the shrinking process.
4. Shrinkwrapping
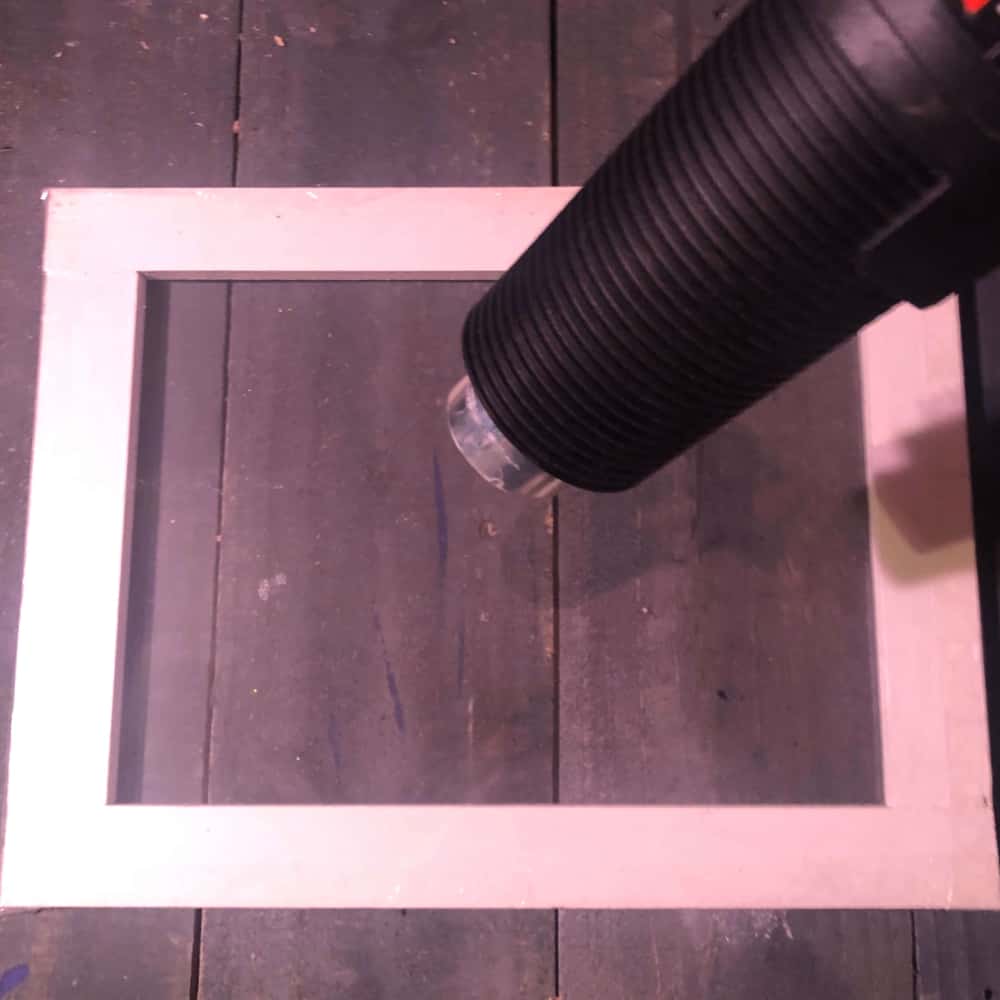
At one time or another, you have likely used shrink wrapping to wrap a gift or seal a document.
The shrink wrapping for this project is what will make your window airtight and look clear as glass.
A hairdryer or heat gun (on low heat and at the proper distance) is used to uniformly heat the plastic until it is taught.
Start on low heat and keep enough distance at first until you know the right amount of heat to use.
You cannot do any harm if you start the shrink-wrapping process slowly.
If you apply too much heat, it is very easy to melt a hole through the plastic.
Continue to heat the plastic evenly alternating from one side of the window to the other until all the wrinkles are removed. Stop as soon as the wrinkles are gone.
If you shrink the plastic too much, it may not melt but it will pull away from the adhesive holding it in place.
10 Cold Weather Hacks That’ll Keep You Warm This Winter
Are you looking for ways to chase off the ice-cold chill of winter? Try these 10 expert cold weather hacks that will help you stay warm and toasty! These are the very best tips that we use all winter long to stay warmer in bitter cold New England Winters.
5. Applying the weatherstripping.
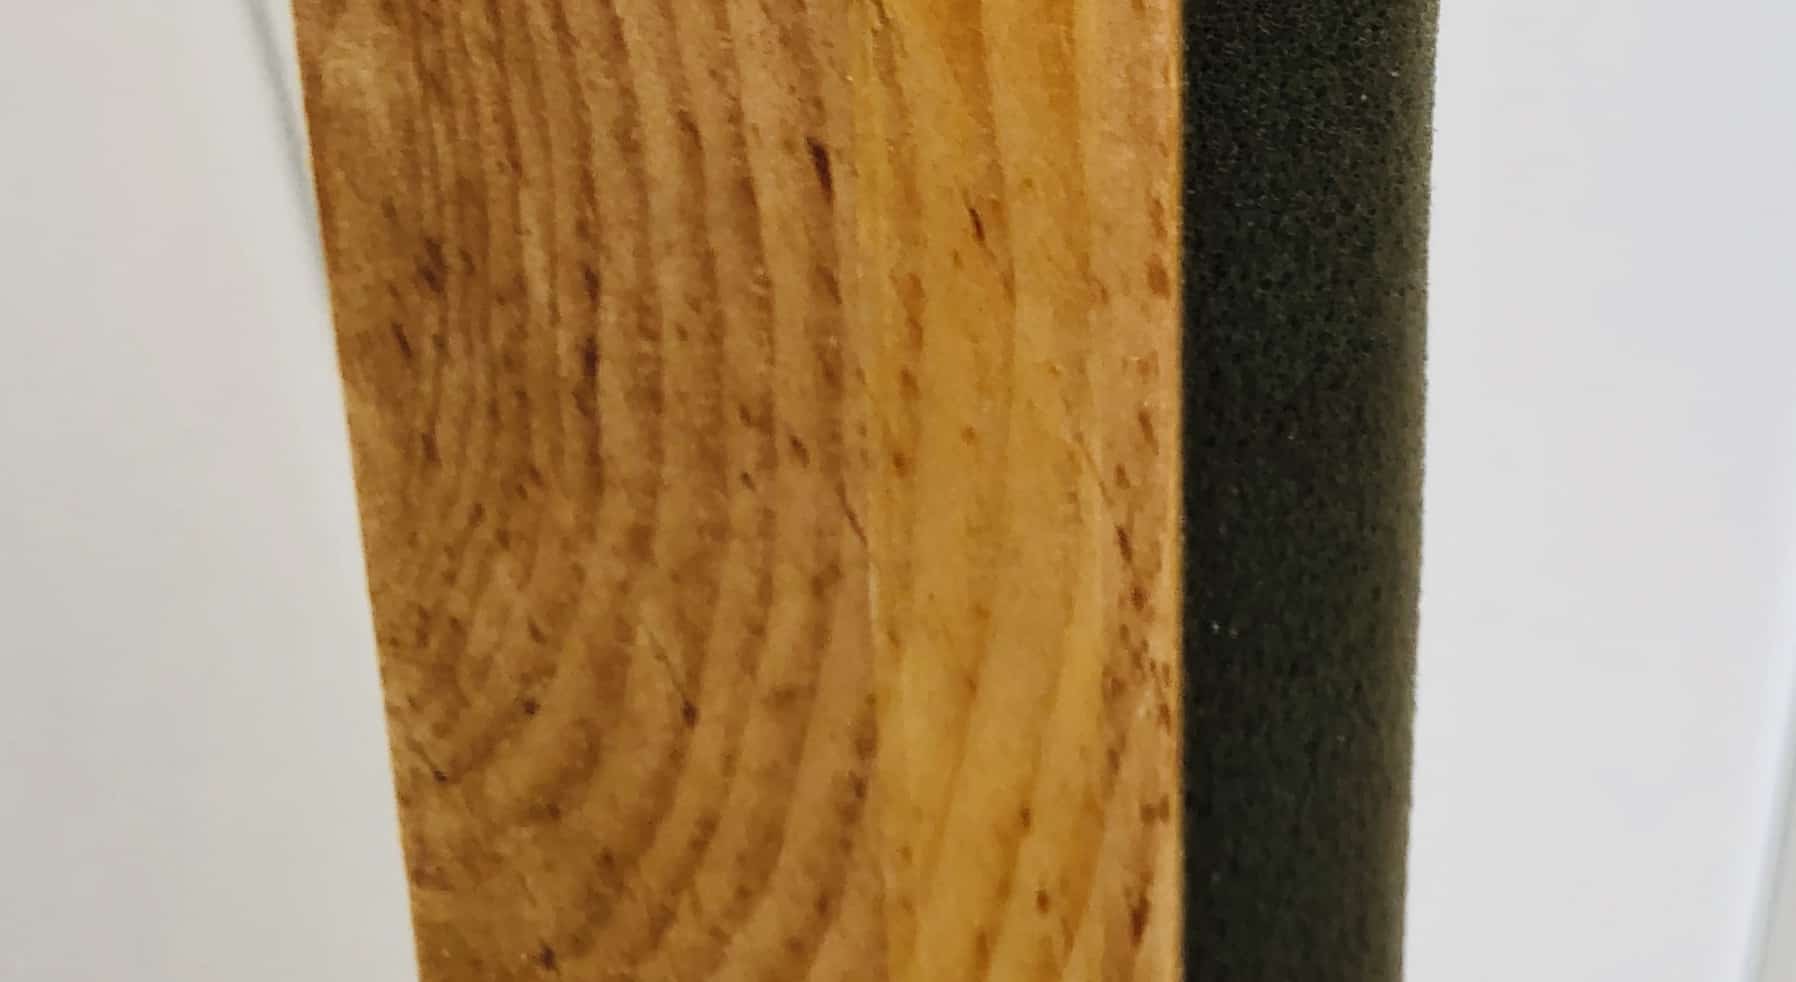
A) The perimeter weatherstripping is what will make your window fit snugly and stay in place.
There are a few types of weather stripping. What is most important is to make sure it is applied with a strong adhesive so it will not pull away.
We use the following steps to make sure the weatherstripping stays intact:
-
Use self-adhesive foam weatherstripping.
-
first place double-sided tape to attach the weatherstripping.
-
Glue both the double-sided tape to the frame and the weatherstripping.
6. Attaching pull tabs to remove the window.
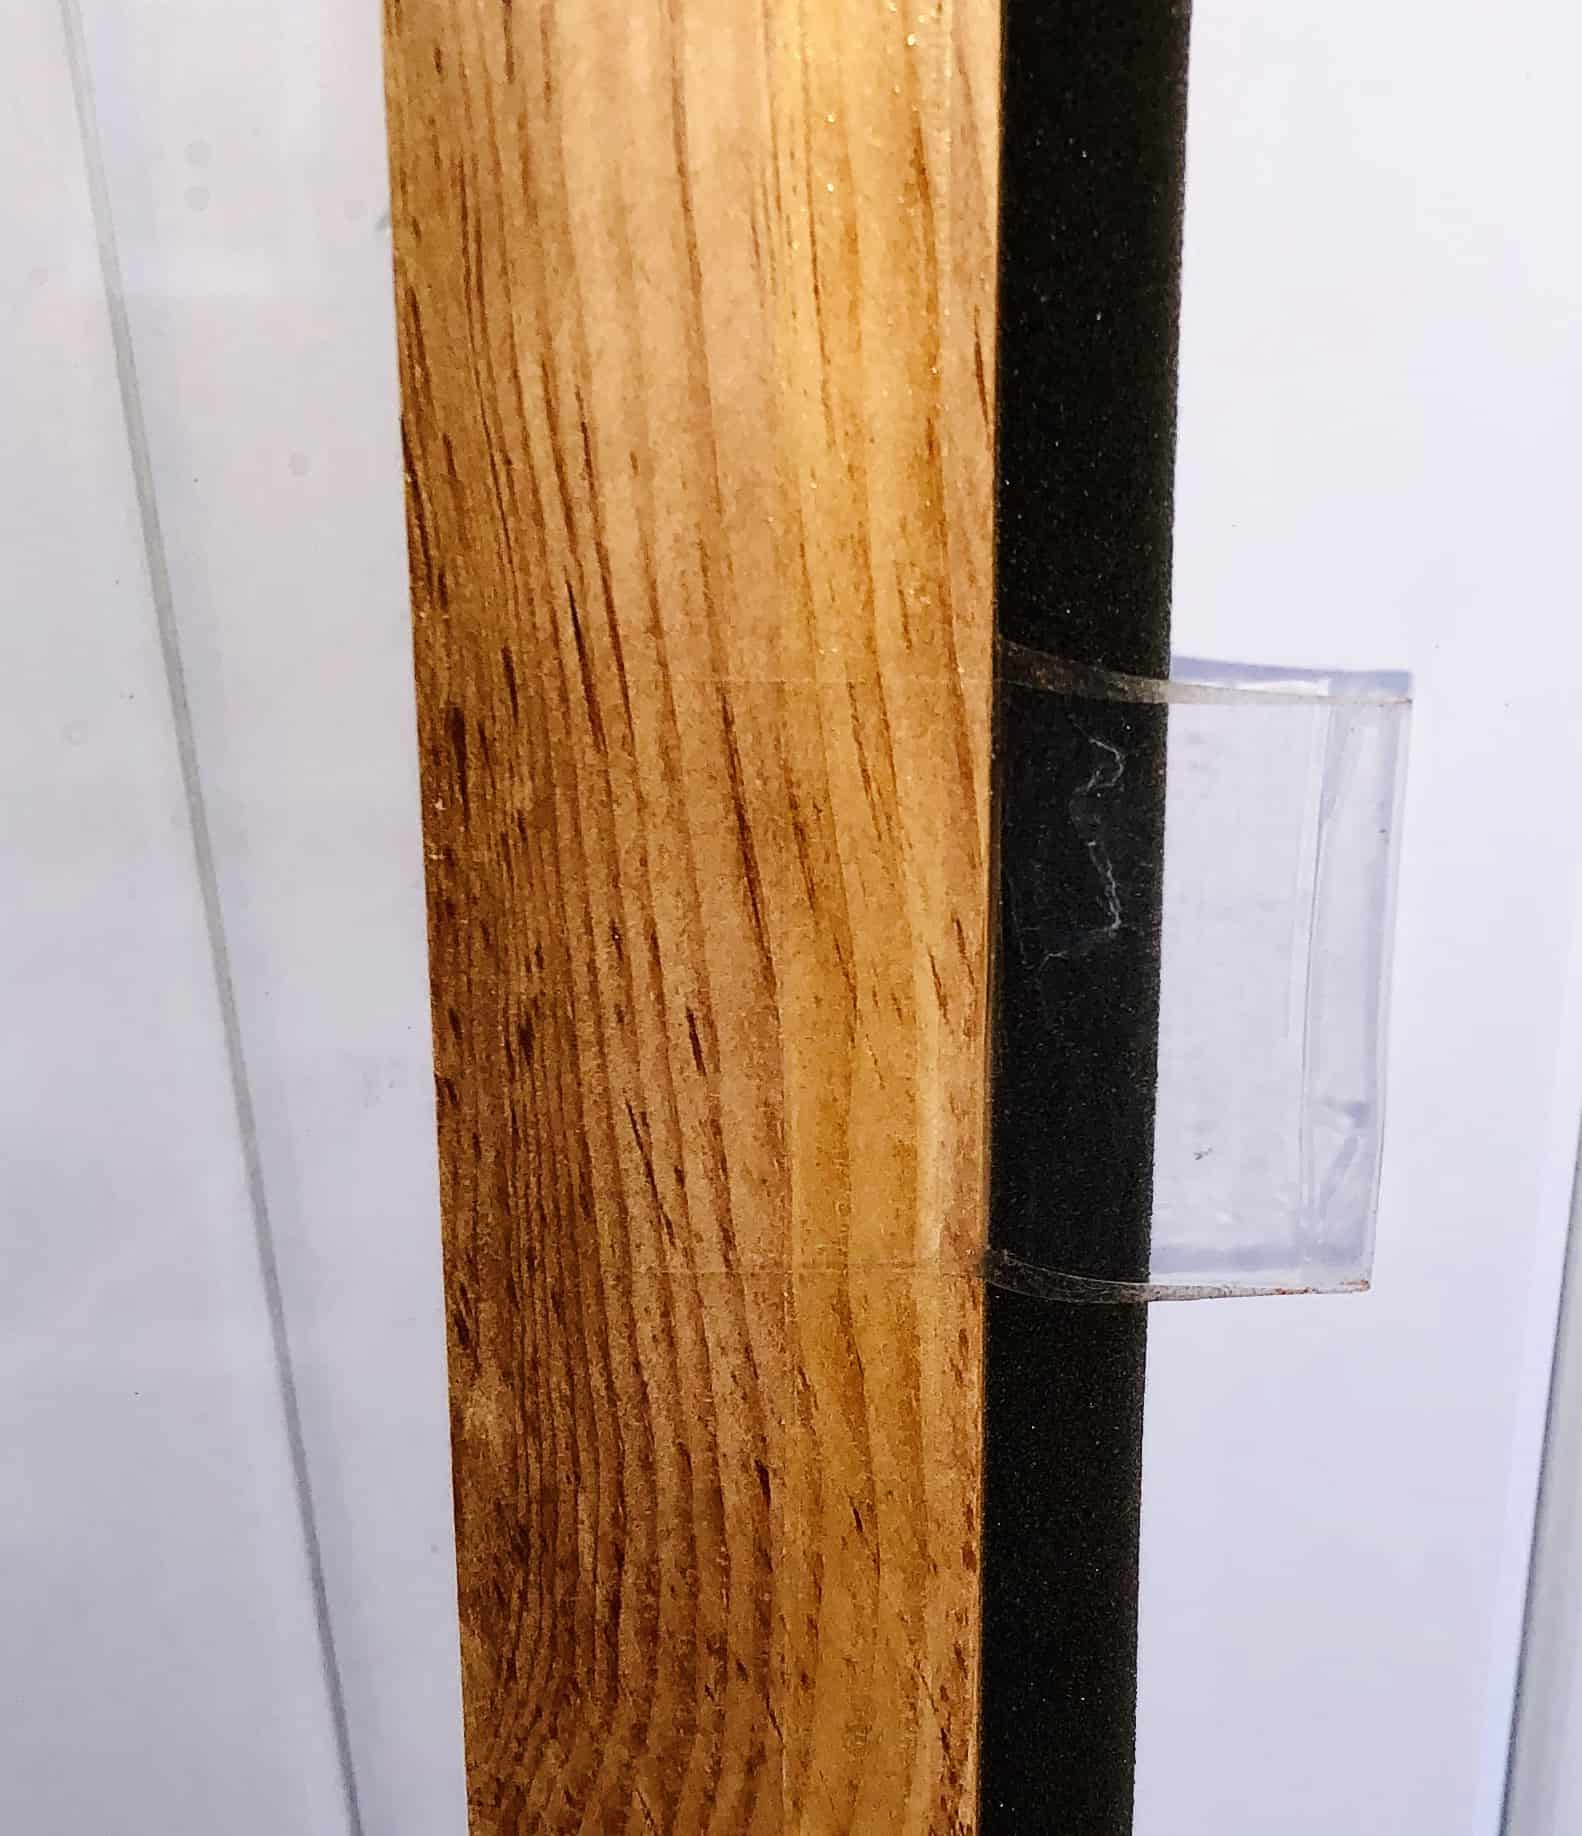
Plastic Pull Tab
Having plastic pull tabs on each side of the DIY window inserts is important when it is time to remove the storm windows.
The plastic sheeting can easily be punctured, so you want to make removal as easy as possible.
Attach the plastic pull tabs in the middle of the window on each side.
Attach the adhesive starting at the front of the window (the part of the window facing out) and use adhesive or glue to bond the pull tab over the edge.
This will leave the tab facing inward so you can easily remove the interior storm window insert.
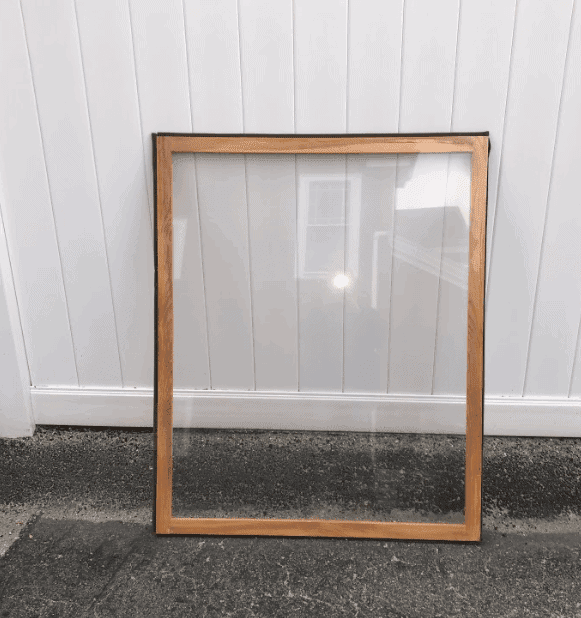
Demonstration of Completed Two-Pane Interior Storm Window Inserts
Pros:
- They are extremely lightweight compared to a standard storm window insert.
- They can be a simple solution for older houses that otherwise require custom-sized window inserts. Custom storm windows or window inserts can be a small fortune.
- DIY window inserts are cost-effective because they’re inexpensive to make and are effective at conserving heat.
- Simple to install and remove using the plastic pull tabs.
Cons:
- They are delicate and need to be handled and stored very carefully.
- Since they can easily be punctured, they may not be suitable if you have young children.
- Plastic interior storm window inserts are not as efficient as double-paned, glass, factory-made windows.
Cost to make interior storm window inserts:
If you want to learn how to make interior storm window inserts, the cost will depend on the size of the window and the materials you use.
- Wood or Resin frames will cost $5 to $10 dollars depending on the size of the window. If aesthetics is not a concern, you can also use free repurposed wood from pallets.
- Window Sheeting: The cost of weatherproofing window plastic varies.
- Tape
- Weatherstripping
The last time I made these DIY interior storm window inserts for my house, they cost less than $10 each. They are a simple and inexpensive solution for drafty older homes.
FAQ’s About Interior Storm Window Inserts:
1. Are storm window inserts worth it?
- The U.S. Department of Energy has determined that window inserts significantly decrease radiant energy loss which can decrease your energy bill by 20% in both the winter and summer.
- Factory-made storm windows or window inserts are clearly more efficient than homemade storm window inserts. However, to benefit from the cost of purchasing and installing custom windows you want to consider how long it will take to realize the savings.
- Replacing windows costs thousands of dollars so it is worth trying to estimate how much you will save each year. Also, consider how long you will be living in your home.
2. Do custom-made storm windows increase the value of your home?
Though replacing windows with year-round, double-paned storm windows can be a plus when it comes to selling your home, many buyers will not see the value compared to a remodeled kitchen or bathroom. Window replacements are a good option if you plan to remain in your home for many years after they are installed.
3. How do window inserts work?
Interior storm window inserts create a pocket of air between your window and the insert. This space acts as an insulating barrier. The space between double-paned factory windows uses this same principle to retain radiant energy. In addition, the dead space between window panes is either vacuum-sealed or filled with inert Argon gas.
4. How much do window inserts for the winter cost?
The higher end for standard winter window inserts that are factory-made is around $40. This cost can go up significantly if custom modifications are made.
5, What are the benefits of storm window inserts?
- The benefits of storm window inserts are far more than just keeping out cold air.
- During the summer the insulating effect of window inserts also helps keep the cold air in.
- For those who live in the city, inserts can help reduce city noise from traffic.
- Lastly, window inserts can reduce the health risk of smog in major cities. Those who live in a major city or factory town are well aware of the build-up of smog-related dirt on windows and blinds. Hopefully, in this setting, air purification is also being used.
6. Are windows replaced from the inside or outside?
Window inserts can be placed on the inside or outside of a window. The goal is still the same which is to create a pocket of dead space. What usually determines if the insert is placed on the inside or outside is the configuration of the window sill and molding. If inserts can easily be placed from the inside this is far more desirable. If placed on the outside the inserts often have to be screwed in place and caulked. In this situation, your window inserts would need to be made out of materials that can withstand the weather.
7. Where do I buy the materials to make interior storm window inserts?
You will definitely want to buy your materials (wood, Insulating kit, tools, etc.) at a large home improvement center such as Home Depot or Lowes. You will pay far more if you purchase materials at an independent hardware store. Small hardware stores are great for items in a pinch and convenience but they do not intend to compete with the large retailers.
Interesting story:
At our local hardware store, a friend went in to purchase a hammer. The price was far more than the same hammer at Home Depot. When the owner was told “I can get this hammer for a lot less at Home Depot” the owner simply replied… “then go to Home Depot and buy it”. He was not angry, local hardware stores have to ask their customers to pay more for personal service and convenience. Small hardware stores cannot compete with large retailers and they don’t try to. This is important to keep in mind for any household projects. It’s also not to say you shouldn’t shop at small businesses as these business owners do offer a valuable service if the lowest cost is not your only goal.